Roasted Carrot Soup

‘Tis the season for soup!  This recipe for a velvety and zingy soup came about somewhat serendipitously.  I usually use carrots for crudités and to add flavor other dishes, but rarely make them the star.  However, after inadvertently ordering 10 pounds of organic carrots online, I realized that carrots were going to need celebrity status for a while!  Roasting the carrots mellows the flavor, and using a bit of low-fat coconut milk and spice lends just a hint of Southeast Asian flair.

The recipe makes 8 generous servings so you can either make it for a crowd or else freeze half the soup for a cold winter’s night.

Ingredients:

  • 2 pounds carrots, peeled and cut into thick 2″ segments
  • 4 tablespoons olive oil
  • 3 teaspoons salt
  • 1 large onion, diced
  • 1 pat (teaspoon) butter
  • 4 cups vegetable broth
  • 3 cups water
  • 1/2 teaspoon ground cayenne pepper
  • 1 15-ounce can of reduced-fat or light coconut milk
  • 1 tablespoon tamarind paste
  • 1 teaspoon ground turmeric powder (optional)

Directions:

  1. Preheat oven to 425°F.
  2. Toss carrots with 2 tablespoons of olive oil and 1 teaspoon of salt.
  3. Roast carrots in oven for approximately 20-25 minutes or until tender and starting to brown.
  4. In a large soup pot, melt butter with two tablespoons of olive oil over medium high heat.
  5. Sauté diced onions in the butter/olive oil until translucent.
  6. Add roasted carrots to the onions and toss together in the pot.
  7. Add 4 cups of vegetable broth and 3 cups of water.
  8. Bring mixture to a boil, and then simmer on low heat for 20 minutes.
  9. Remove soup from heat.  With an immerseable blender, purée the soup.  If you do not have an immerseable blender, cool for 10 minutes and then purée in a blender (using extreme caution by placing only small portions of the soup into the blender so hot soup does not splatter!).
  10. Add to the soup the remaining salt along with cayenne pepper, coconut milk, tamarind paste, and turmeric.  Also, add water as needed if you prefer a thinner consistency. Stir well and bring to a simmer.  Simmer for five minutes and then remove from heat.
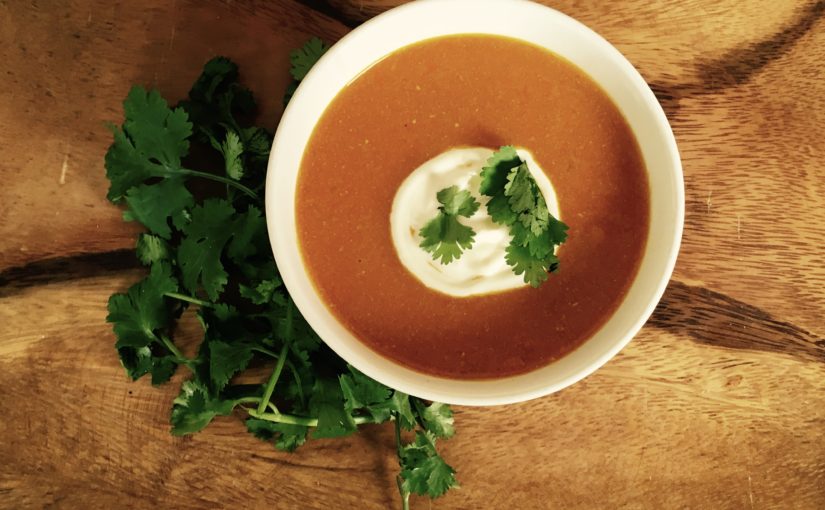
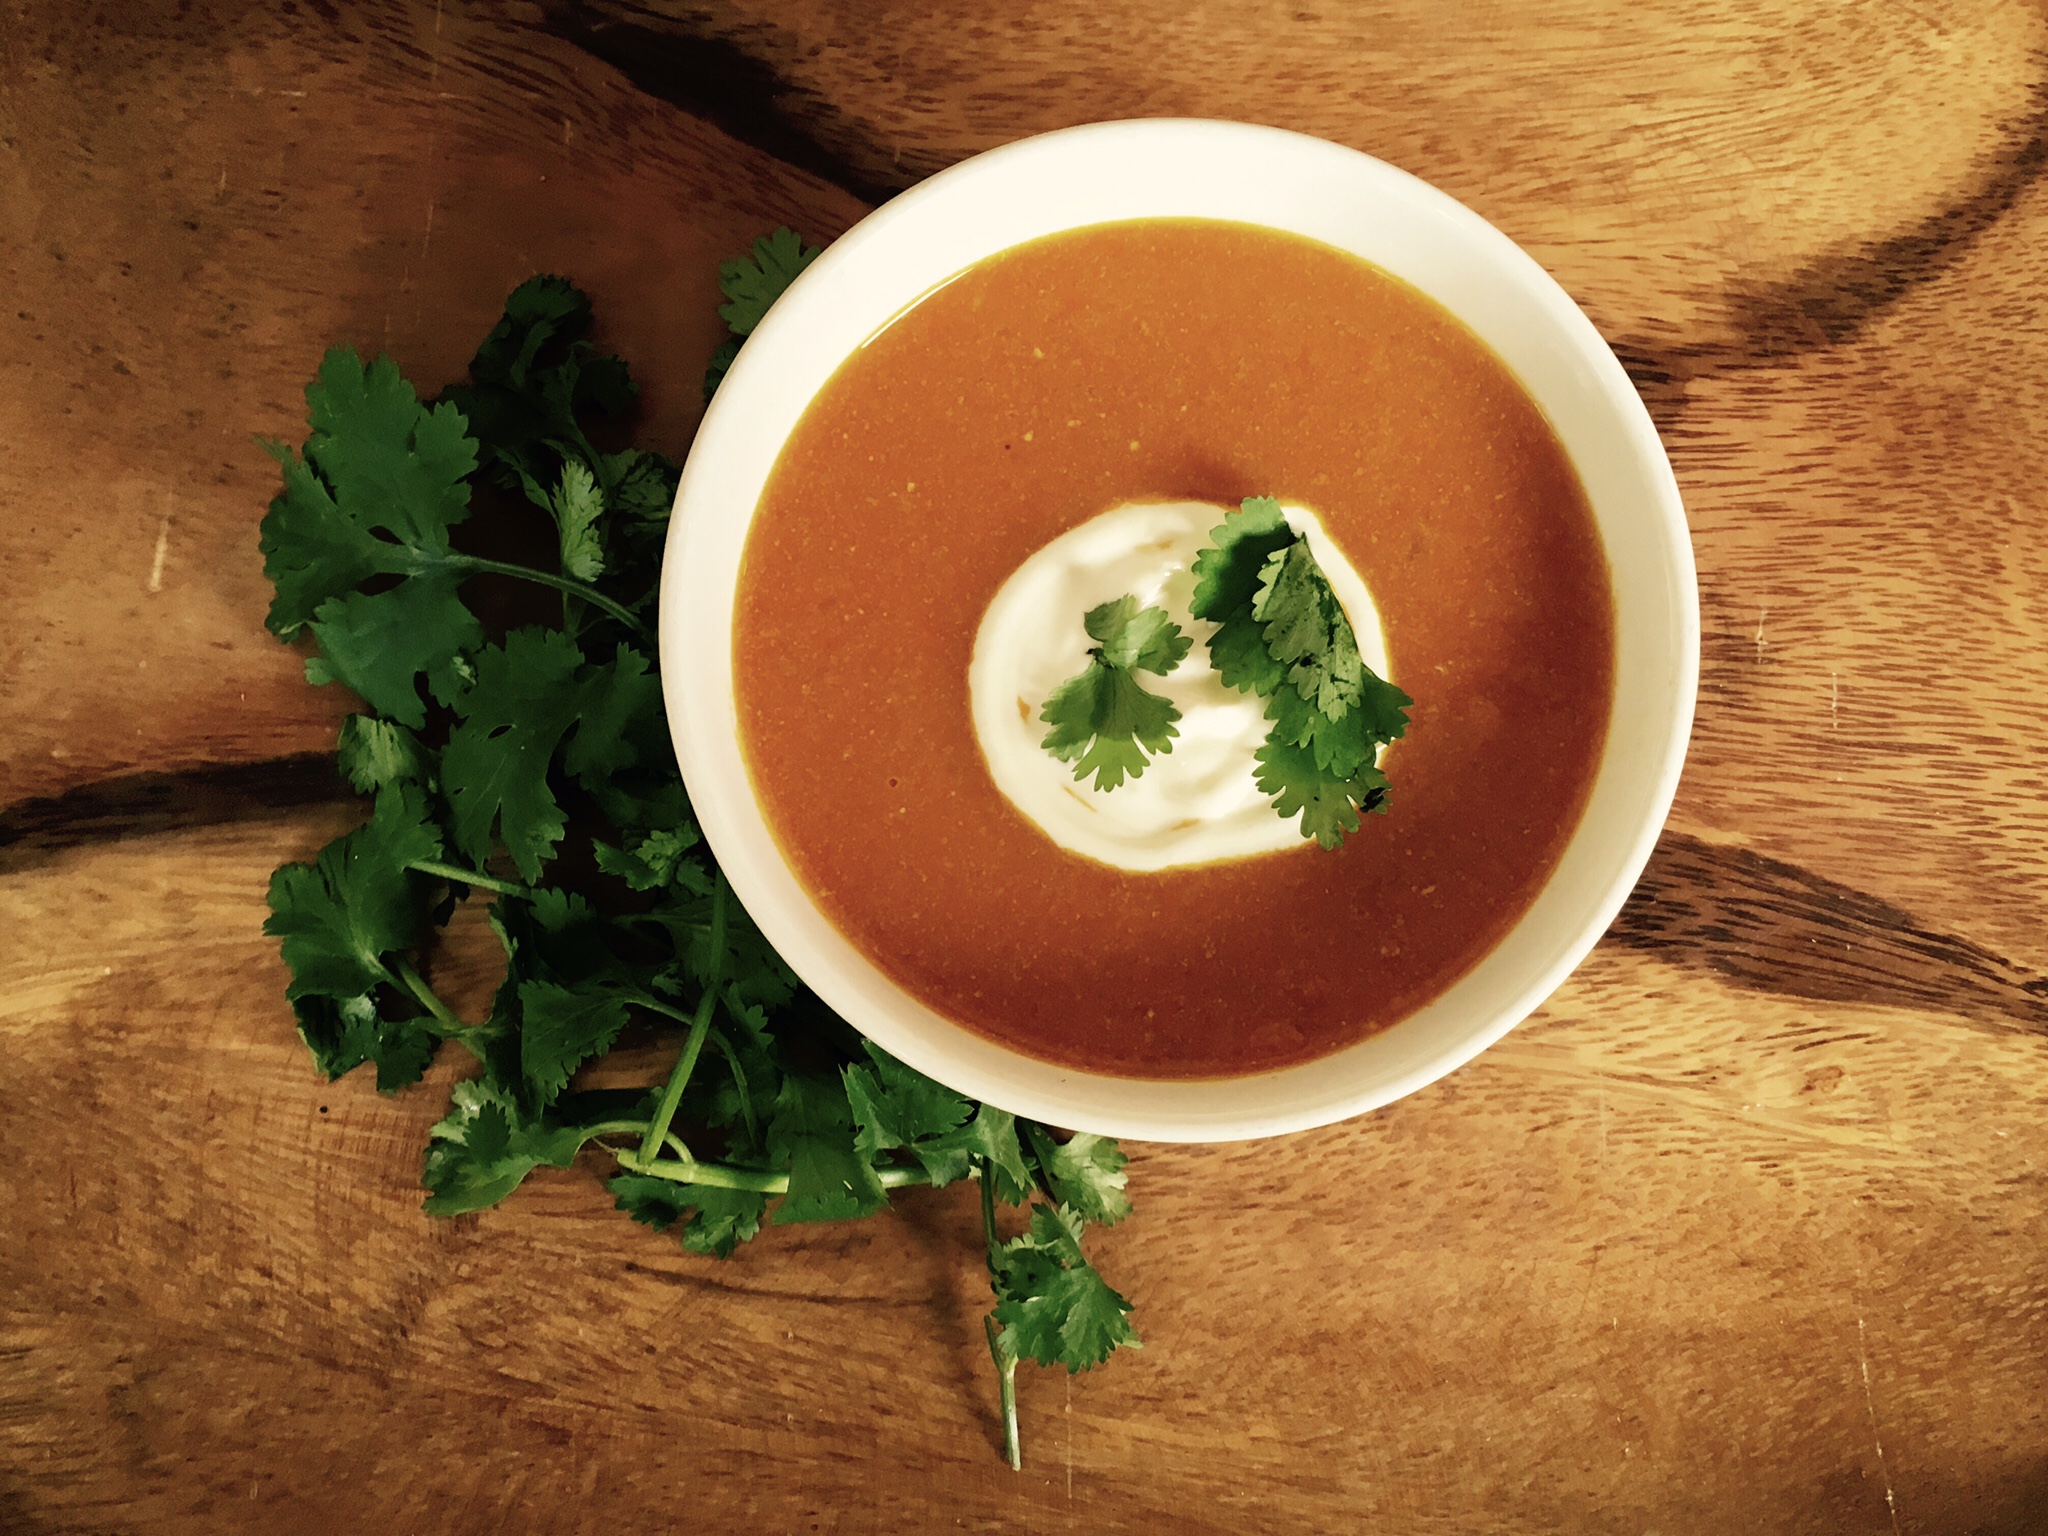
  11. Serve hot with a dollop of sour cream or Greek yogurt and a sprinkle of cilantro (of course)!

Roasted Red Pepper, Tomato & Feta Pita Pouches

Years ago I used to make this very basic cooked eggplant and feta salad that could be stuffed into a pita pocket for a simple summer meal.  That was before I realized that roasted red peppers and feta are a marriage made in heaven.  This revelation came over an appetizer of htipiti (roughly pronounced teep-tee) at DC’s Zaytinya restaurant.  If you haven’t had it, htipiti is a thick, garlicky roasted red pepper and feta dip that will make you send your hummus to the back of the line.  Our inner circle affectionately and irreverently calls this delicious concoction “hitty pitty” based on our initial butchering of the name when trying to ordering it, and now I look for it routinely on Mediterranean menus.  In any case, this recipe is a reconfigured version of pita pocket salad that incorporates not only roasted red peppers but also tomatoes and mint which you might even find in your back yard this summer.  (Oh, and by the way, if you can’t get to Zaytinya, Chef Jose Andres was kind enough to share the htipiti recipe publicly).

Ingredient notes:  Roasting the bell peppers for this recipe is definitely worth it, even though it adds about 60 minutes to the prep time.  If you’re pinched for time, you can certainly use roasted red peppers out of a jar.  Feta is the other star in this salad so it’s great to get a slab of fresh feta and break it coarsely, rather than use pre-crumbled feta which can kind of disappear into the vegetables.  Finally, for the pita bread you’ll want to use sturdy loaves as the salad is pretty juicy and will make a thin bread fall apart.

Ingredients:

  • 4 red bell peppers
  • 2 ripe tomatoes, seeded and diced
  • ½ red onion, diced fine
  • 2 garlic cloves, minced
  • 6-8 fresh mint leaves, chopped chiffonade style
  • 6 ounces feta cheese, broken into coarse chunks
  • 2 tablespoons balsamic vinegar
  • 2 tablespoons olive oil
  • ½ teaspoon oregano or Italian seasoning
  • Dash of sea salt
  • Black pepper
  • 4 loaves whole wheat pita bread, halved into pockets

Directions:

1.  Preheat oven to 450°F (use a roast setting if you have it).

2.  Put whole red bell peppers on baking tray and place in oven for approximately 30 minutes, turning once.  Remove from oven once skin is charred and peppers are quite tender.  Immediately cover baking tray with aluminum foil and seal at edges.  Set aside for 30 minutes.  (This last step makes it easier to peel the skin off.)  Remove foil and remove the skin and seeds from each pepper.  Dice the peppers.

3.  In a medium mixing bowl, combine peppers, tomatoes, onion, garlic, feta, and mint.

4.  In a small bowl, whisk together the balsamic vinegar, olive oil, oregano or Italian seasoning, a dash of salt, and a sprinkle of pepper.

5.  Pour the dressing into the salad and mix gently.

6.  Spoon salad into pita pockets immediately before serving.  Serves 4.

Variations:  This recipe will also work well as a substitute for bruschetta, served on top of crostini.

Coconut-Tamarind Salsa Fresca

Last summer our family traveled to London and enjoyed lots of amazing and varied Indian cuisine including Bombay cafe fare at Dishoom, colonial-era dishes at the institution of Chutney Mary, and modern food with traditional flavors at a fabulous local chain called Masala Zone that was a midday oasis for our weary feet. One of my favorite finds at this last place – and the inspiration for today’s blog – was a fairly simple appetizer called masala pappadum. Pappadum is a super thin, crispy lentil wafer, usually fried, that is often served before or with a meal, like the bread basket or a basket of tortilla chips. In this case, each was topped with just a sprinkling of tomatoes, onions, cilantro, and coconut that gave every bite a wonderful zing to complement the crunch of the pappadum. This recipe is my attempt to recreate these flavors and textures. With summer around the corner, this is a fun alternative to the regular fresh salsa or bruschetta you might make with the season’s tomato crop.

Ingredient Notes: Tamarind concentrate is pretty easy to find these days and it’s worth having a small jar around (it seems to last for a very long time) as I don’t know of another ingredient that offers the same unique tang. However, if you don’t have tamarind paste, Nigella Lawson offers substitute of lime juice with brown sugar. If you use pappadum, the small “madras wafers” or “appalas” available at Indian stores are great here. You can avoid deep frying them by coating a few with cooking spray or brushing with a thin layer of canola oil, and then microwaving them in a single layer for about one minute. Otherwise, you can easily substitute corn tortilla chips – thin, restaurant style tortilla chips would be best. Finally, for the coconut you can use fresh grated coconut, dried coconut or some Asian grocery stores have frozen flake coconut which closely resembles fresh.

Ingredients:

  • 1 ripe tomato, seeded and diced fine
  • ⅓ cup red onion, diced fine
  • Serrano, Thai chili, or small jalapeño peppers, seeded and chopped fine
  • ⅓ cup unsweetened coconut, grated or flakes
  • 2 tablespoons cilantro, chopped
  • 1 teaspoon lime juice
  • 1 teaspoon tamarind concentrate
  • 1 teaspoon honey
  • ½ teaspoon sea salt
  • 8 pappadum or approx 2 dozen tortilla chips

Directions:

  1. Combine chopped tomato, onion, cilantro, and peppers in a bowl.
  2. In a separate small bowl, whisk together the lime juice, tamarind paste, honey, and salt.
  3. Pour lime and tamarind mixture over the chopped tomato, onion, cilantro, coconut, and peppers. 
  4. Sprinkle onto crispy pappadum or tortilla chips and serve immediately. Serves 4.

Eggplant Tikka Masala

Did you know that chicken tikka masala is considered a national dish of Britain? Crazy that it’s that popular, right? When I was growing up, chicken tikka masala was something you saw on the Indian buffet line but no one I knew made it at home, and as such I never had a tikka masala sauce recipe passed down. When my husband and I were first married, we dabbled a little bit into similar dishes like paneer makhni (Indian cheese in a tomato butter sauce) with decent results but a lot of recipes we saw relied heavily on butter and cream. More recently, I contemplated a lighter version that uses roasted eggplant wedges and was thrilled with the results.
Ingredient Notes: The small round Indian eggplants (like around 4 inches long) that are sold in Asian or Indian grocery stores work well here, although they are not essential. Also, I recommend San Marzano canned peeled tomatoes as they are flavorful and easy to keep on hand. Finally, store-bought garam masala spice blends can really vary in quality. I am lucky to have some amazingly fresh, flavorful garam masala from the Bombay Emerald Chutney Company which delivers successful flavors in this dish without the need for a cupboard full of spices.

Ingredients:

  • 8 small Indian eggplants or 1 regular eggplant, sliced into thick wedges
  • 2 small yellow onions (one cut in thick slices, one diced)
  • 2 tablespoons olive oil
  • 1 pat of butter
  • 2-3 garlic cloves, minced
  • 1 walnut-size piece of ginger, peeled and grated
  • 2 serrano, Thai chili or small jalapeno peppers, chopped fine
  • 1 28-ounce can whole peeled tomatoes
  • 1 teaspoon garam masala (use 1/2 teaspoon for a milder flavor)
  • 2 tablespoons plain yogurt, sour cream or half and half
  • Salt
  • Chopped cilantro for garnish

Directions:

  1. Pre-heat oven to 425°F.
  2. Lightly salt the eggplant wedges to reduce water content and set aside in a colander or on paper towels for 15 minutes. After 15 minutes, pat dry with paper towels.
  3. Toss eggplant and thick-sliced onion with 1 tablespoon olive oil and spread out on a roasting pan.
  4. Roast eggplant and thick-sliced onion for approximately 12-15 minutes or until tender, and slightly charred. Set aside.
  5. In a large saucepan, heat butter and 1 tablespoon of olive oil on the stove over medium heat. As butter is melting, add and sauté chopped onion and then after a minute add minced garlic, grated ginger, and chopped peppers.  Sauté until onions are translucent. Stir in tomatoes.
  6. Turn the heat to low and let the mixture simmer for 8-10 minutes.
  7. Turn the heat off. Use an immersable blender directly in the saucepan to puree the ingredients. If you do not have an immerseable blender, carefully transfer to a blender to puree the mixture, and then return it to the saucepan. If you transfer to a blender, please use caution to prevent spattering of the hot contents.
  8. Stir in the yogurt, sour cream, or half and half. Mix in the roasted eggplant and onions.
  9. Salt to taste and add a garnish of fresh chopped cilantro 🙂 prior to serving. Serves 6.


Variations:

You can substitute almost anything for the roasted eggplant in this recipe! The other day I added lentils and lightly cooked potatoes to the sauce for a hearty main dish. For something lighter, you can add roasted cauliflower and peas. And, of course, you can always add sauteed paneer, or grilled chicken or shrimp to the sauce as well. Enjoy!

Welcome to A Sprinkle of Cilantro!

Why “A Sprinkle of Cilantro”?

Cilantro is the one fresh herb I have on hand at all times. I love its vibrant green color (so much that I considered tiling my whole kitchen with cilantro-green colored tiles at one point), grassy scent, and invigorating flavor. And as a very practical cook, I love its versatility for use not only in the Indian cooking of my heritage, but also in Asian, Mexican, Mediterranean, and many other cuisines.

When I was growing up, my mom and my aunts would put the finishing touch on their steaming dishes of lentils and vegetables, or a cool cucumber raita, by carefully sprinkling a handful of fresh, chopped cilantro on top before calling everyone over to eat. A bowl of previously dried lentils or chickpeas would come alive with spices, fresh chopped onions, and green cilantro leaves on top. In our house, cilantro was typically applied as a garnish when we had company, so I came to associate the herb with festive get-togethers and family gatherings, and to this day still feel like topping a dish off with cilantro gives it a little extra zazz.

If every cooking experience is an adventure, I find that the point at which you sprinkle that cilantro on food signifies the most exhilarating part of the journey. Why? Because it represents the precise and special moment when your efforts as a chef are complete, your dish is fresh, prepared, and picture perfect, and ready to be fed to the people you love.

Having said all of this, there are some folks for whom cilantro literally tastes like soap. So if cilantro’s not your herb of choice, don’t fret. Maybe you can identify better with the placement of a fresh sprig of rosemary, or a sprinkle of parsley or mint. For the purpose of this cooking blog, it is not cilantro itself but rather the engagement of all the senses that is important, and therefore it is “A Sprinkle of Cilantro” that will be my muse.


Thank you for joining this very exciting journey and let’s get started!